Top Ten Tips for Chicken Egg Incubation

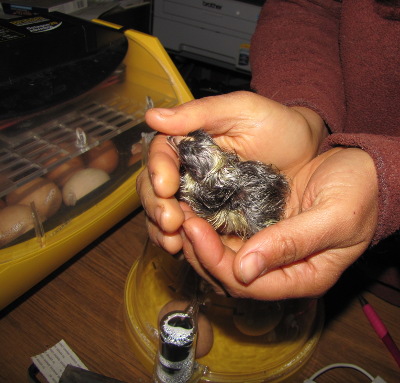
Newly hatched chick

Are you thinking of hatching your own chicks this year? Make every egg count with the following steps:

  1. In a perfect world, set your eggs vertically in the incubator (like they sit in an egg carton) with the blunt end up.
  2. Maintain steady temperatures throughout the incubation period. Set the thermostat at 99.5 degrees Fahrenheit (37.5 Celsius) for a forced-air model or 102 degrees Fahrenheit (38.9 Celsius) for a still-air model.
  3. Although instructions that come with your incubator may recommend keeping internal humidity between 40% and 50% during the early incubation period, followers of dry incubation prefer a much lower humidity (between 25% and 35%). Dry incubation has been the most successful for me.
  4. Monitor egg weight loss and use that data to tweak humidity levels.
  5. Keep those eggs moving! An automatic egg-turner is best.
  6. Minimize egg touching and time outside the incubator. While candling can give you some clues about what’s happening inside, the best hatch rates will be achieved by keeping the incubator closed at all times. Don’t mess with your eggs once they’re in place.
  7. Ensure adequate airflow by keeping the vents wide open. Even in the shell, chicks have to breathe.
  8. Plan ahead for hot days and power outages. You’ll need a way to keep chicks at the right temperature even if the electricity flickers out.
  9. Incubating and Hatching Homegrown ChicksAll the rules change on day 18. Turn off automatic egg turners. Lay eggs flat. Increase the humidity.
  10. Maintain cleanliness of the incubator and equipment between batches.

Follow those simple rules and you’ll soon have cute fuzzballs bursting out of your incubator. For more hands-on information, check out my book Incubating and Hatching Homegrown Chicks.

How to Choose and Store the Best Eggs for Incubation

Selecting Eggs for Incubation

The first step when incubating eggs is selecting the very best ones. Not all eggs will hatch out healthy chicks, and there are several factors that stack the deck in favor of success.

First up is your eggs’ parentage, which will have an impact on fertility rates. A flock consisting of young birds out on lush pasture will result in better eggs than a flock of old birds stuck in the coop 24/7. Inbreeding can also be an issue in small flocks — this might be a reason to swap eggs with a chicken-keeping friend every once in a while.

Porous eggs

Next, you can tell a lot by looking at each individual egg. You probably already know that huge eggs can be double-yolkers, so you’ve likely guessed that average-sized eggs are best. You’ll also want to skip, cracked, dirty, and porous eggs. Take a look at the image above to get an idea for what I mean by the last point if you’ve not already aware.


Storing Eggs

In a perfect world, you’d go out to your coop, collect the exact number of perfect eggs you need, then pop them in the incubator that day. But most of us don’t have flocks big enough to make that happen. If you have a small flock, you’ll need to store eggs for a few days until you accumulate enough to fill the incubator.

Whatever you do, don’t put these eggs in the refrigerator since cold can harm embryos and make the eggs much less likely to hatch. Instead, cut the top off an egg carton and put each egg in pointed-side down. Place the stored eggs in a cool (55 to 68 degrees Fahrenheit; 13 to 20 degrees Celsius) place out of direct sunlight.

Storing eggs for incubation

To ensure that the embryos don’t stick to the shell, put a thick book or a block of wood under one end of the egg carton and swap the carton end-to-end twice a day, tilting all of the eggs at once without touching them. The less you touch your eggs, the more likely they are to hatch.

Each day an egg waits to go in the incubator, it becomes slightly less viable. The aging process accelerates drastically after day seven. In addition, high heat during the storage period can age eggs prematurely. For these reasons, try to get your eggs into the incubator within a week after they’re laid and store them at or below room temperature.


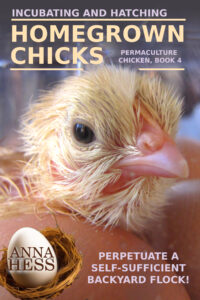
Incubating and Hatching Homegrown ChicksFind out more in my book!

Do you want more tips for increasing your hatch rate? Incubating and Hatching Homegrown Chicks will level you up so you’re confident you can hatch healthy homegrown chicks every time!

Raise your hatch rates!

Are you thinking of leveling up this year, hatching your own eggs into a replacement flock? Then you’re in luck because my beloved incubation handbook is available in print for the very first time!

This is the same information that had previous readers glowing:

“I have had problems with incubating chicks, getting low to no hatch, and high hatch mortality. All of the info in this book makes great sense! This helped me a lot to fix ALL of my hatch problems.” — sunnyweller

“I especially found the “helping chicks hatch” section very helpful. Followed the instructions and saved two chicks!” — Keaokun

“My first attempt at incubating was a dismal failure. I only hatched 6 of 19 eggs. Two of those had facial and beak deformities. This little ebook was so helpful and I was able to pinpoint – many – things I had done wrong.” — V. Schafer

“Awesome book, well written. Not too basic nor too much extraneous detail.” — chem girl

Learn from my mistakes so you don’t have to repeat them. Grab your copy of Incubating and Hatching Homegrown Chicks today!